This tutorial will show how you can use fdisk to partition your drives
Commands
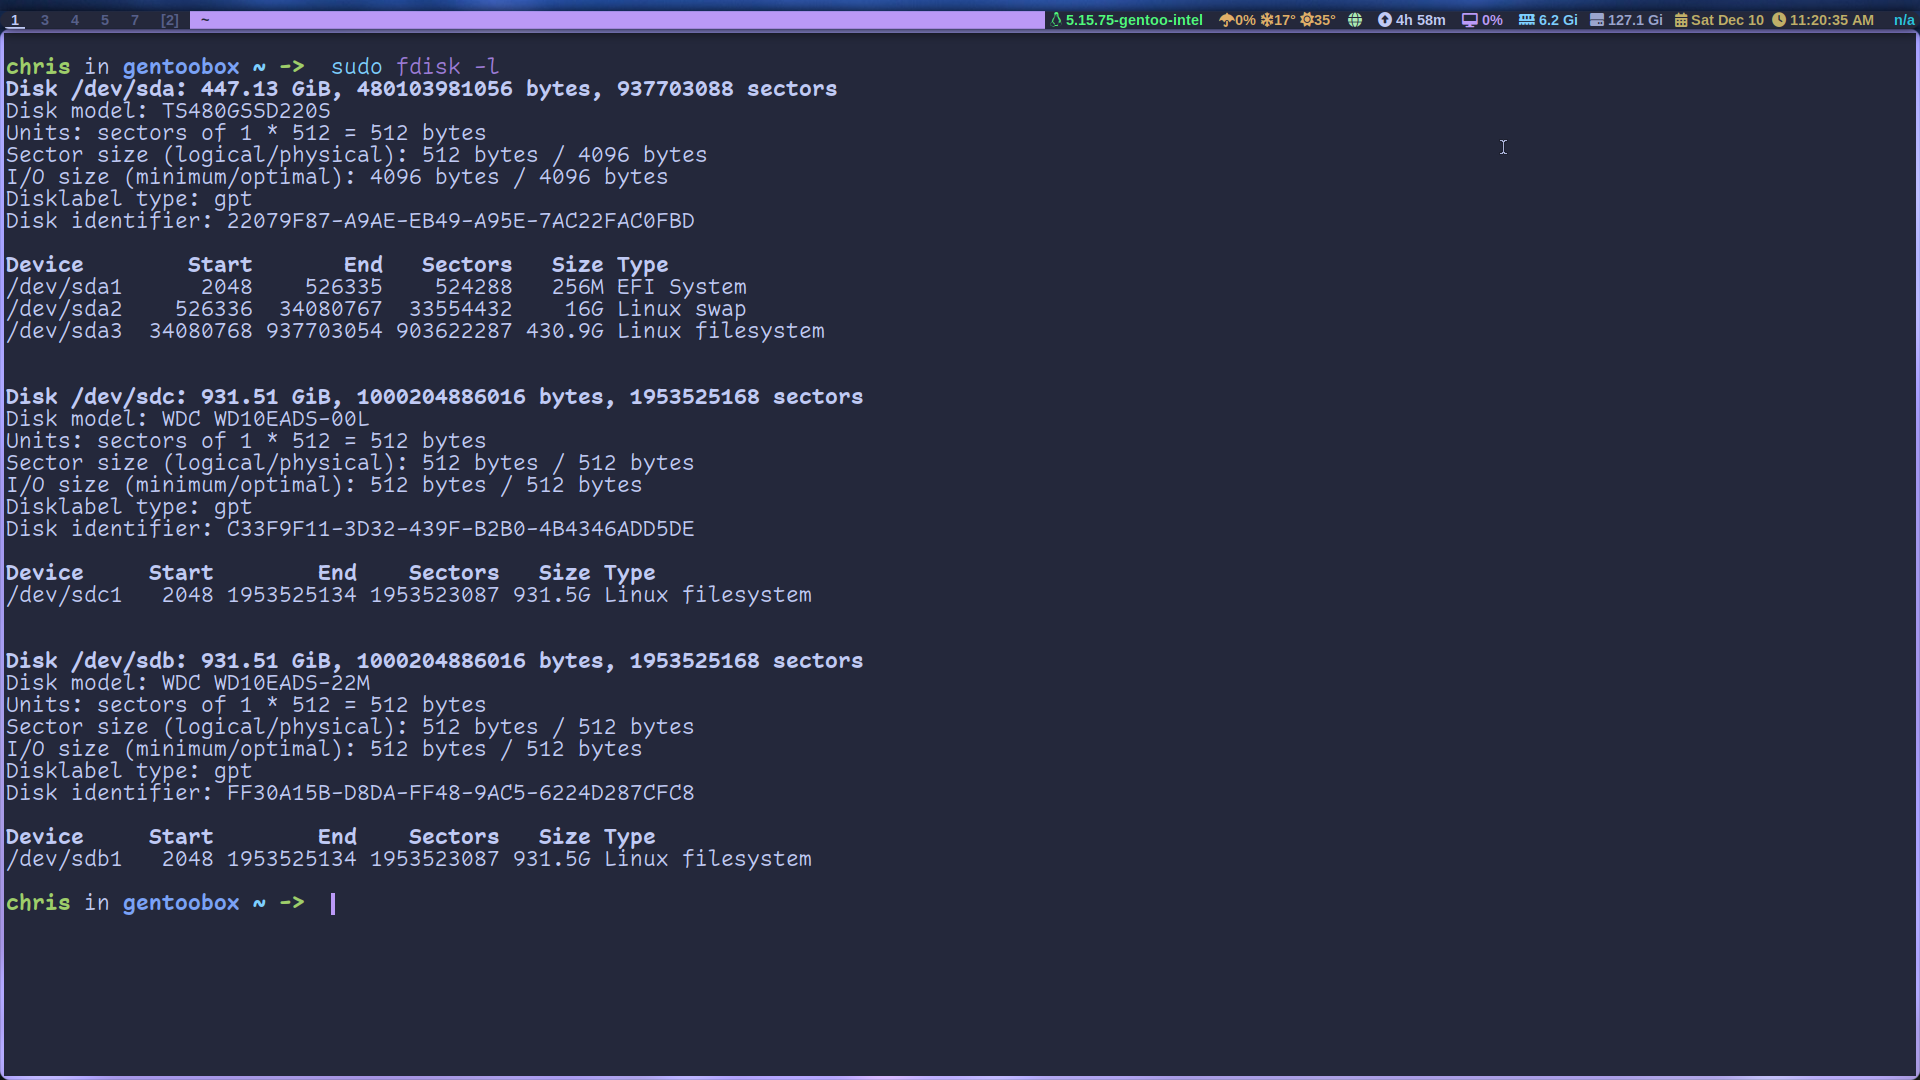
List out your disks with:
1sudo fdisk -l
You’ll see all the drives connected to your machine and their mount points. On my machine the main disk is /dev/sda, it has 3 partitions and they all play a different role: /dev/sda1 is the boot partition, /dev/sda2 is swap and /dev/sda3 is the root partition where the main data is located. Don’t worry if your drives are named differently, NVME drives start as /dev/nvme0n1.
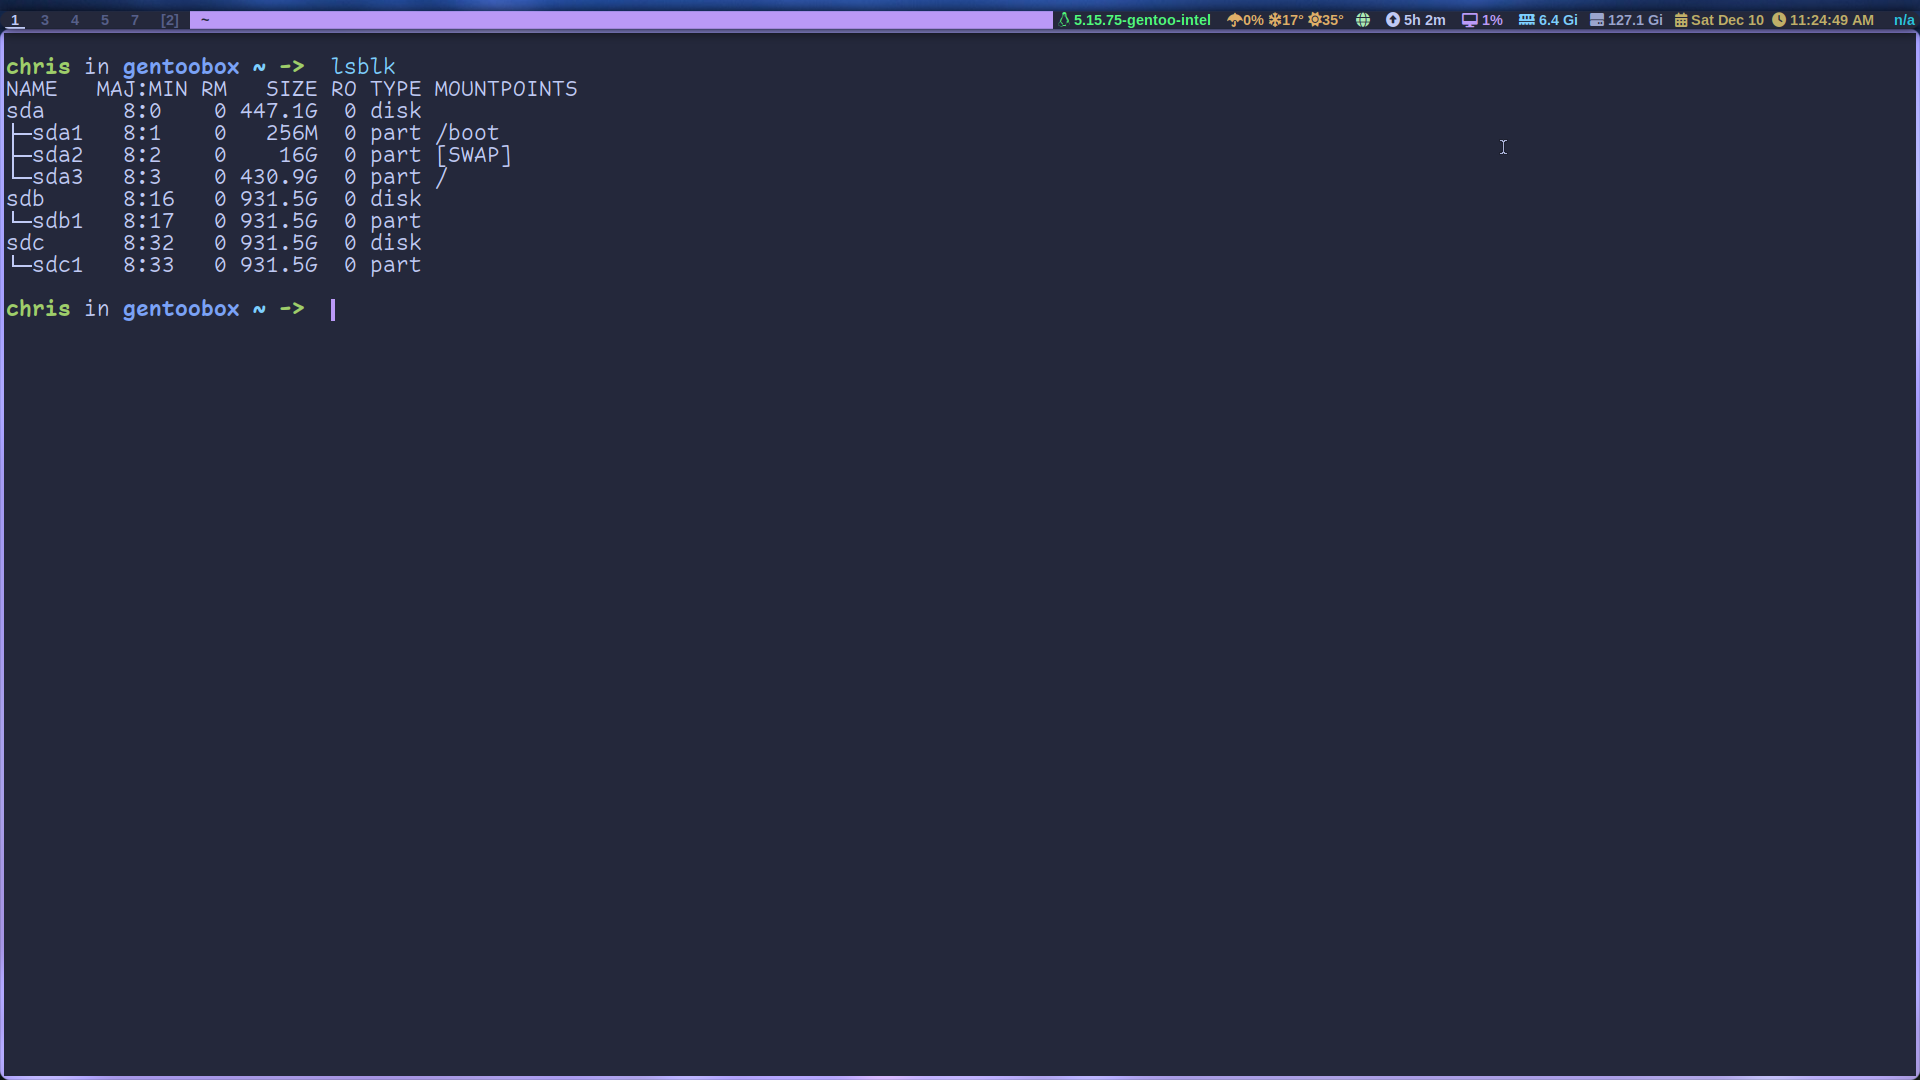
You can also run lsblk to get mount point information.
Now let’s play around with our drives. Warning make sure you have the CORRECT drive’s name before you input any commands, you could end up wrecking your whole system.
Let’s re-create my /dev/sda/, its structure is what you would need when installing a new Linux distribution through the command line, like Arch or Gentoo. Go ahead and switch to your root user since all these commands require sudo, it’s much easier to just be root.
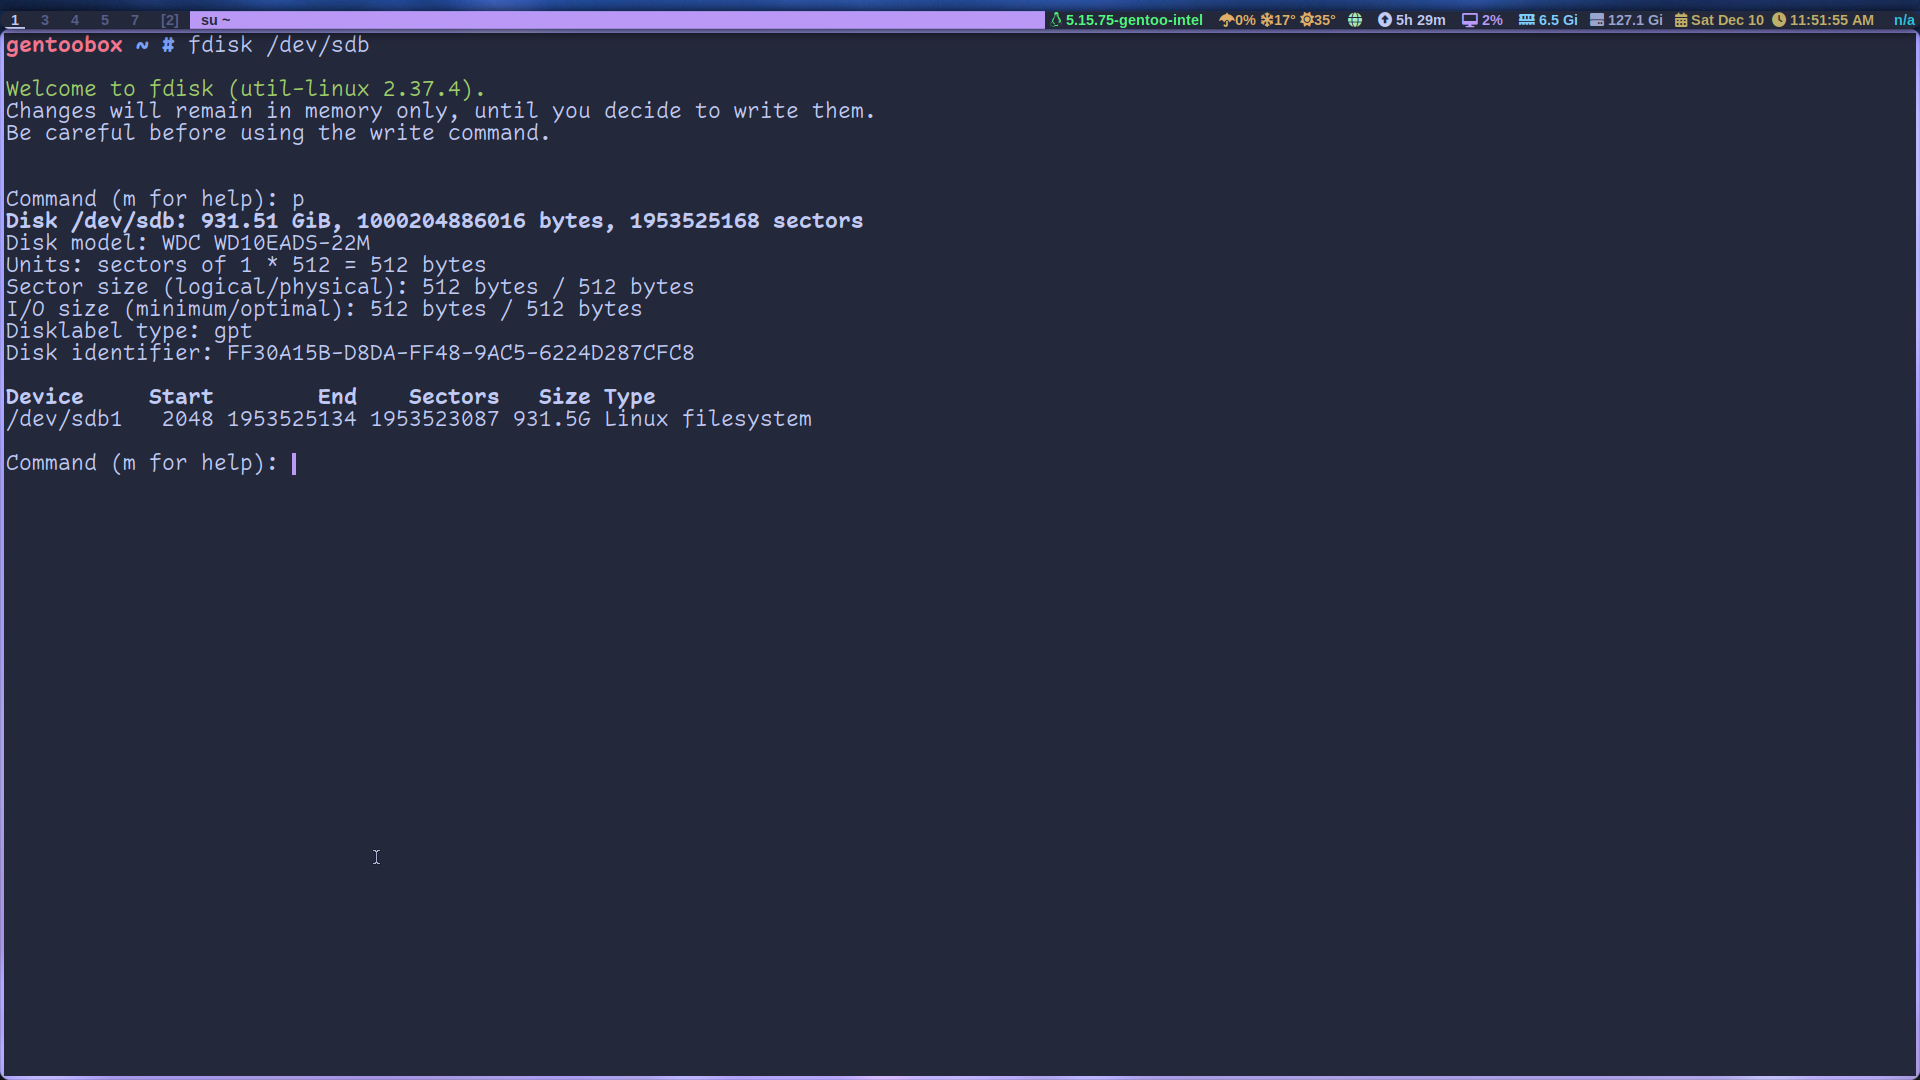
1fdisk /dev/sdb
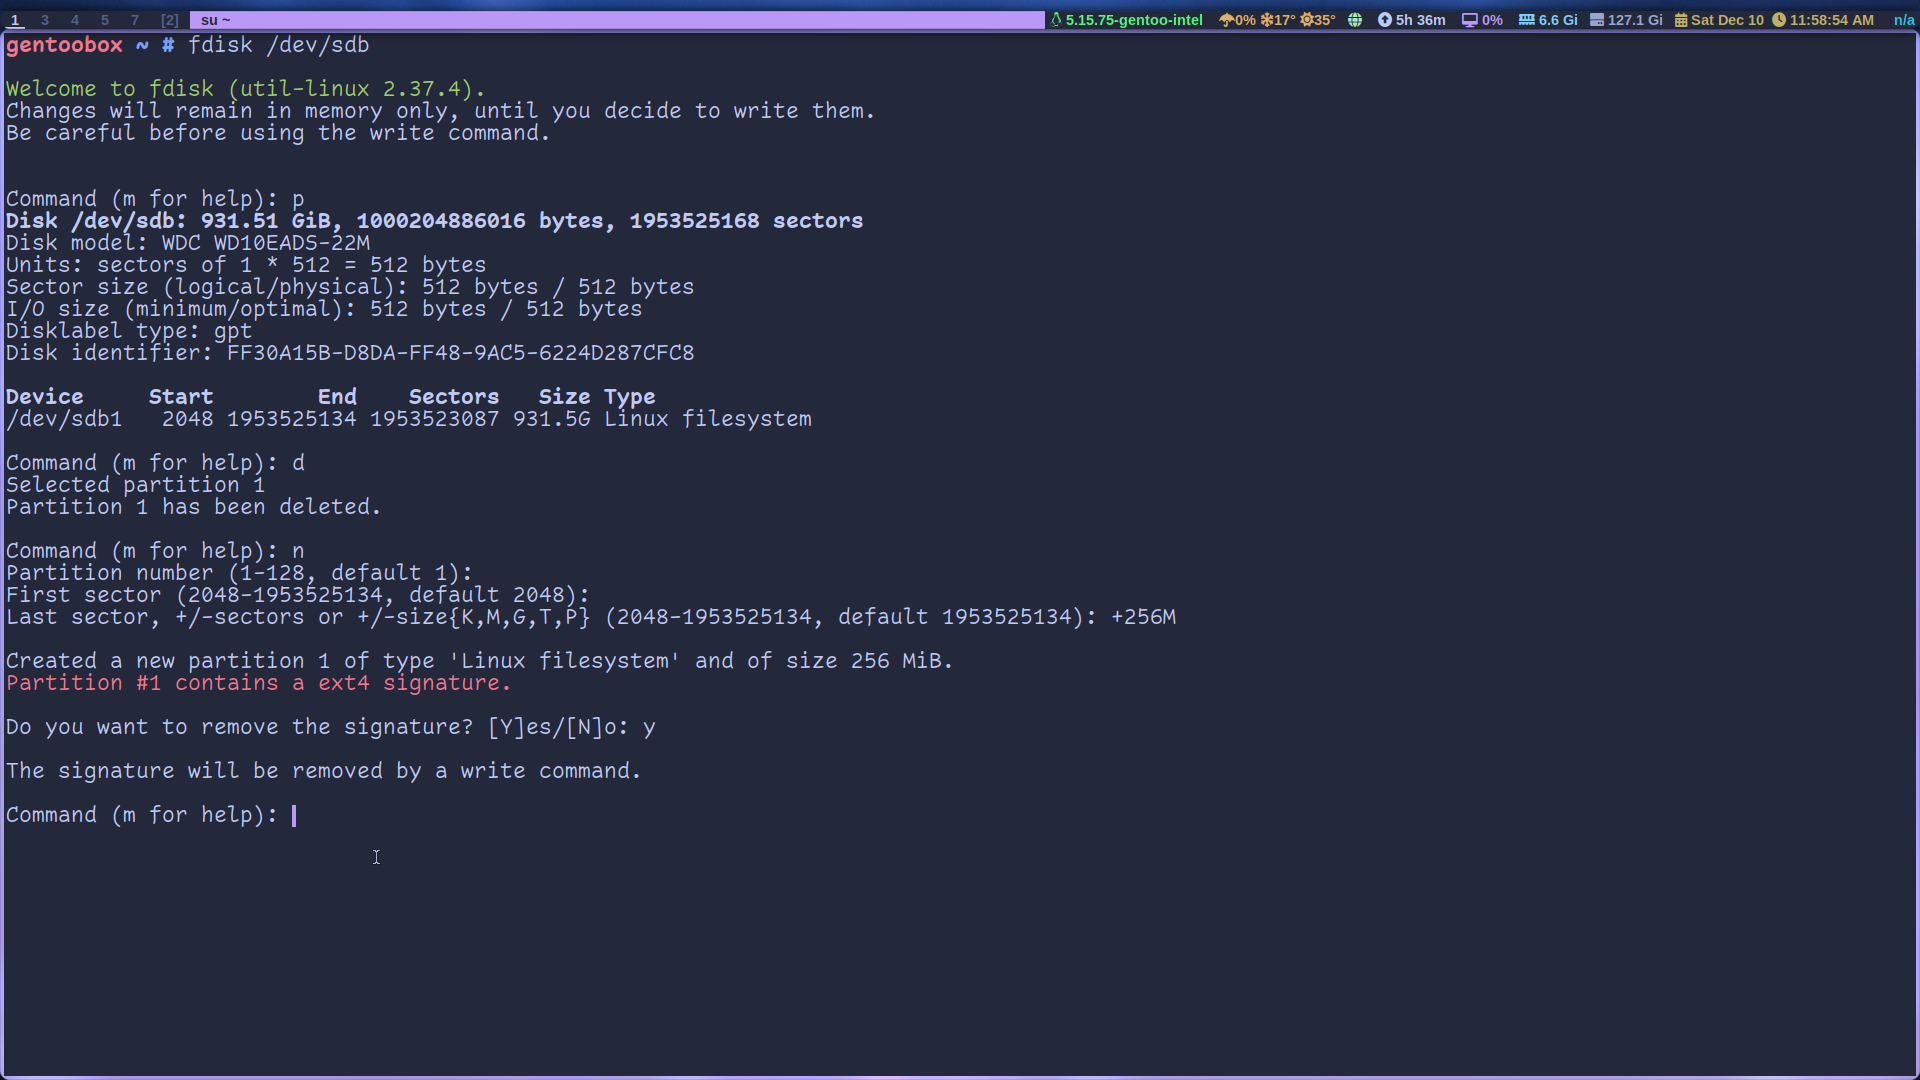
Run the p key to display the partitions:
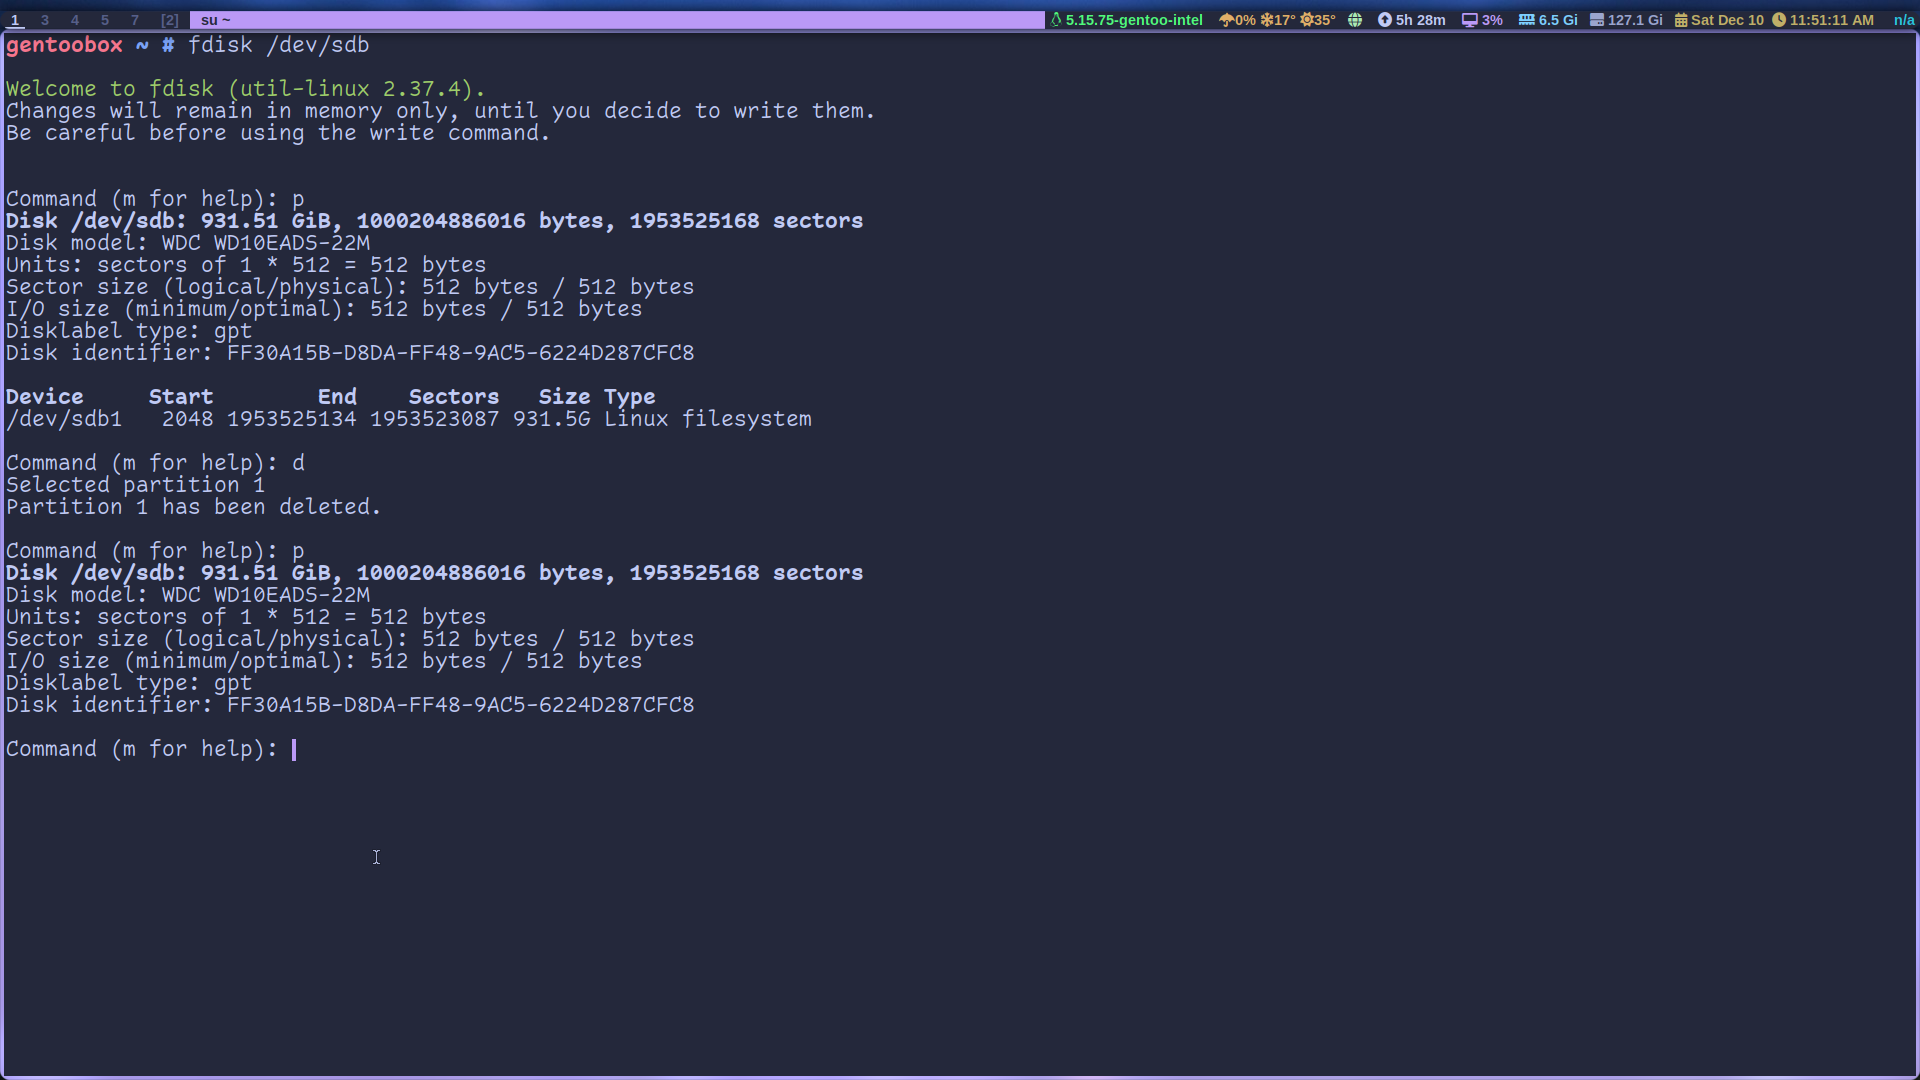
This is my backup drive, but it’s empty for now, so I’ll blow away all the partitions. To do that, we press the d key to delete. Now you can see that partition doesn’t exist. (If you make a mistake just exit fdisk, changes won’t be written unless you use the command to write them.)
First the boot drive: type the n key to create a new partition, pick partition 1, first sector default and last sector add +256M. This means our boot drive will be 256MB.
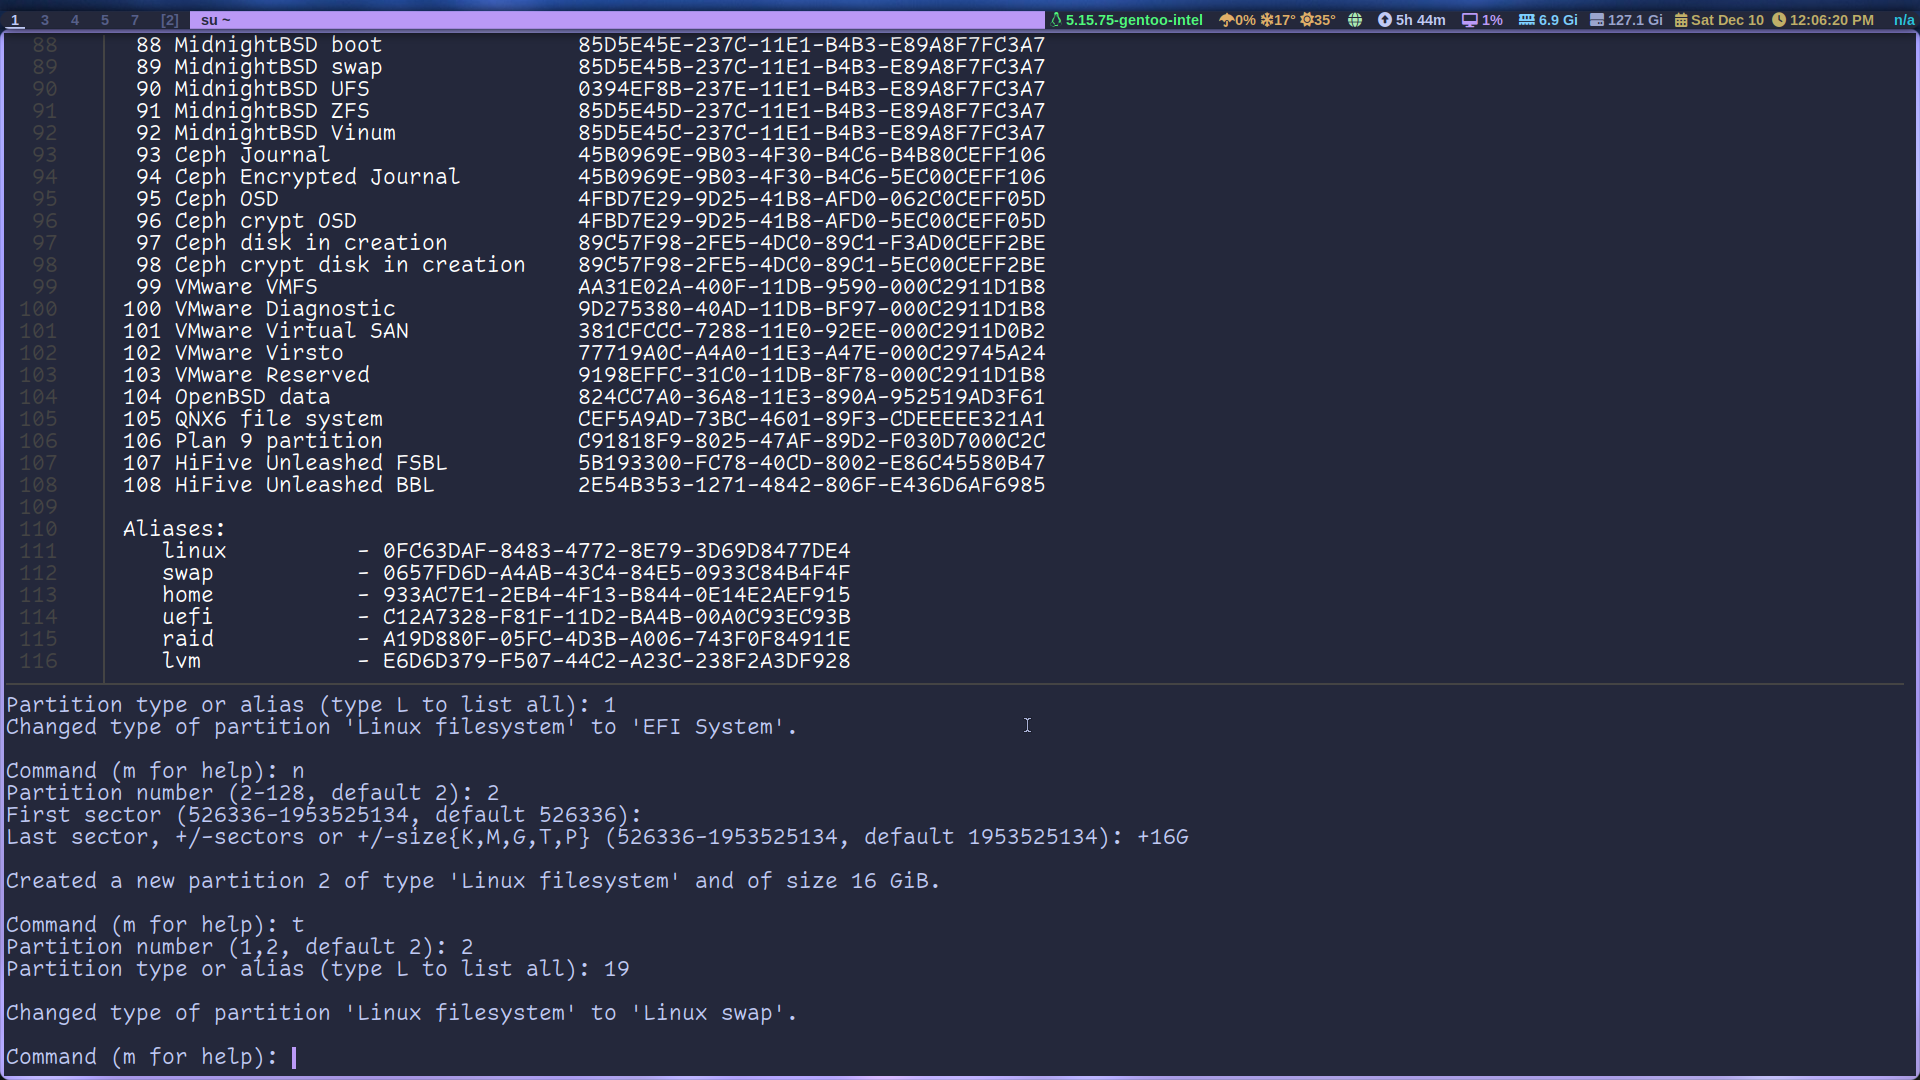
Turn it into an EFI partition by pressing the t key and choosing 1 for the EFI option.

Create the swap: press n then press 2 for second partition hit “enter for the first sector” and the amount of ram your machine has for last sector +16G. Now press t for type choose partition 2 and choose type 19
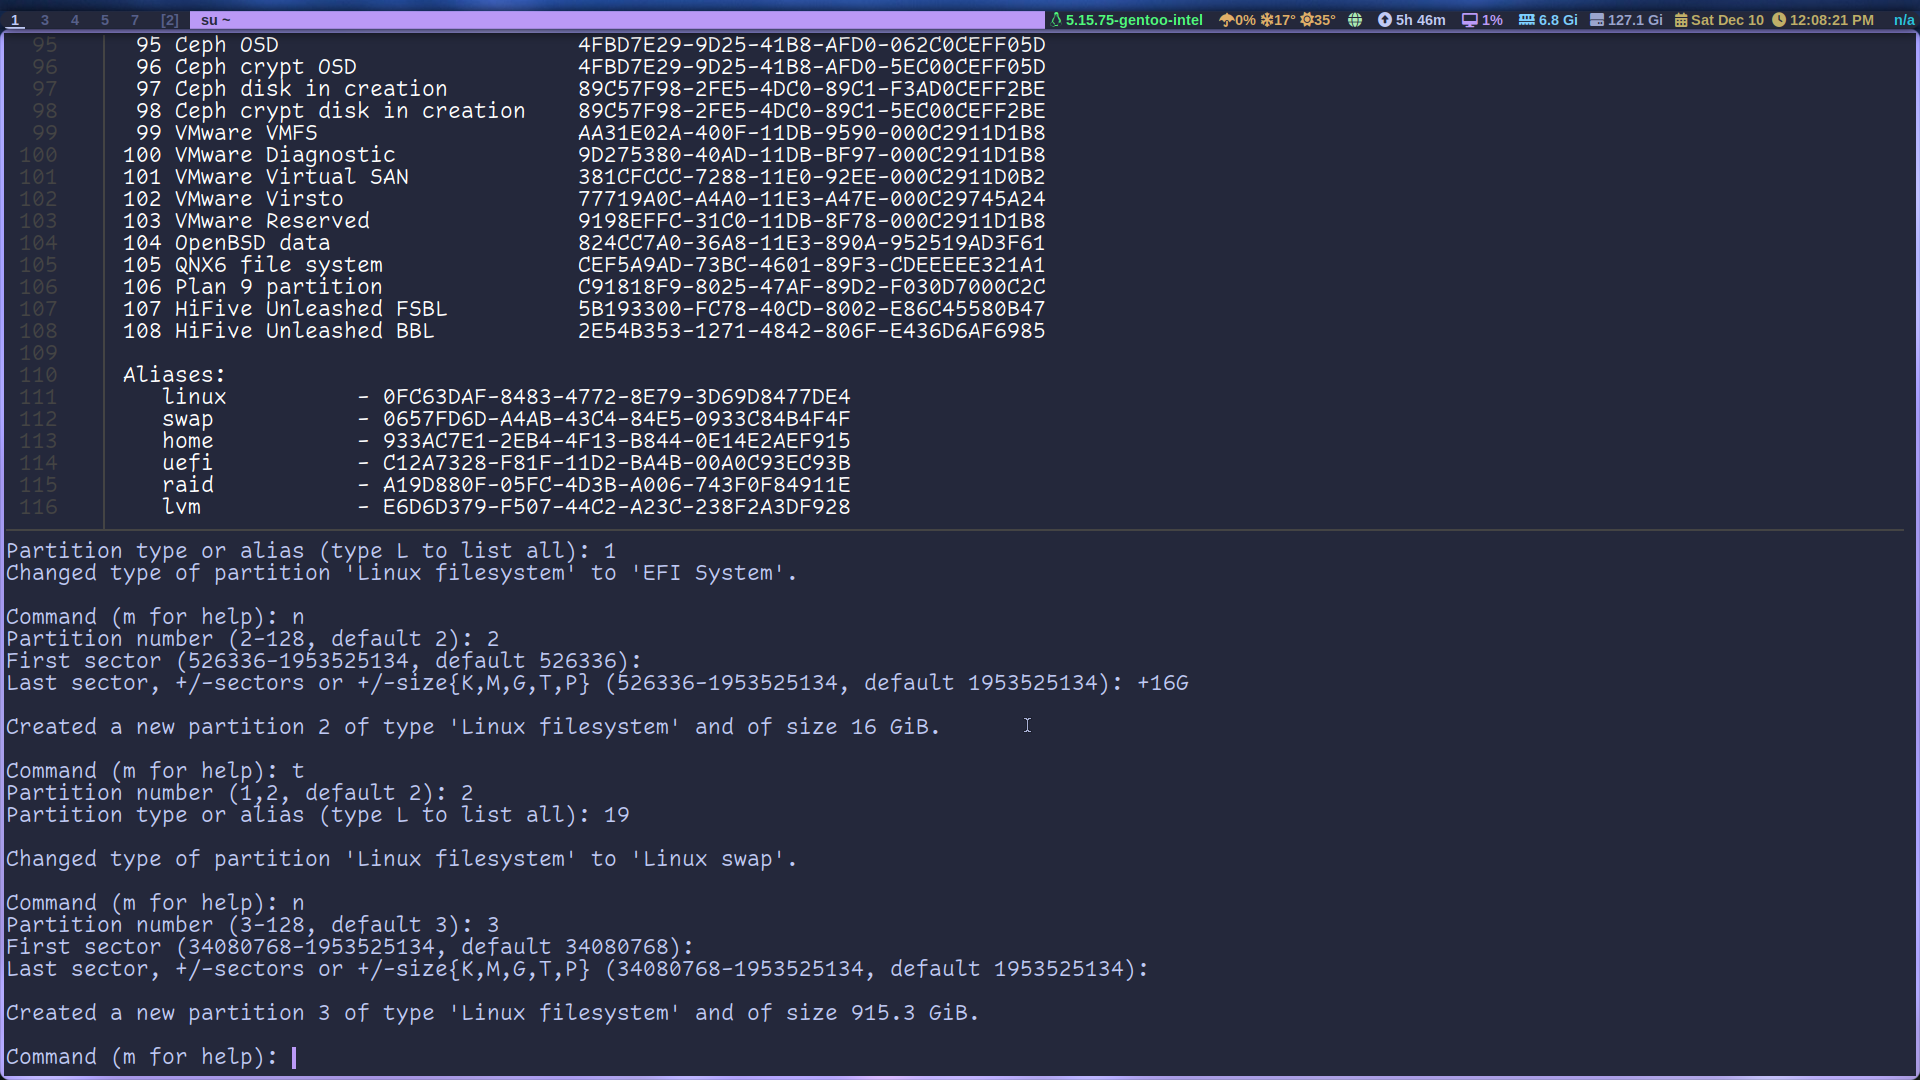
And lastly create the root partition: n, press 3 for third partition and choose defaults for first and last sector which will take all the reaming disk space.
And now your disk should look like this:
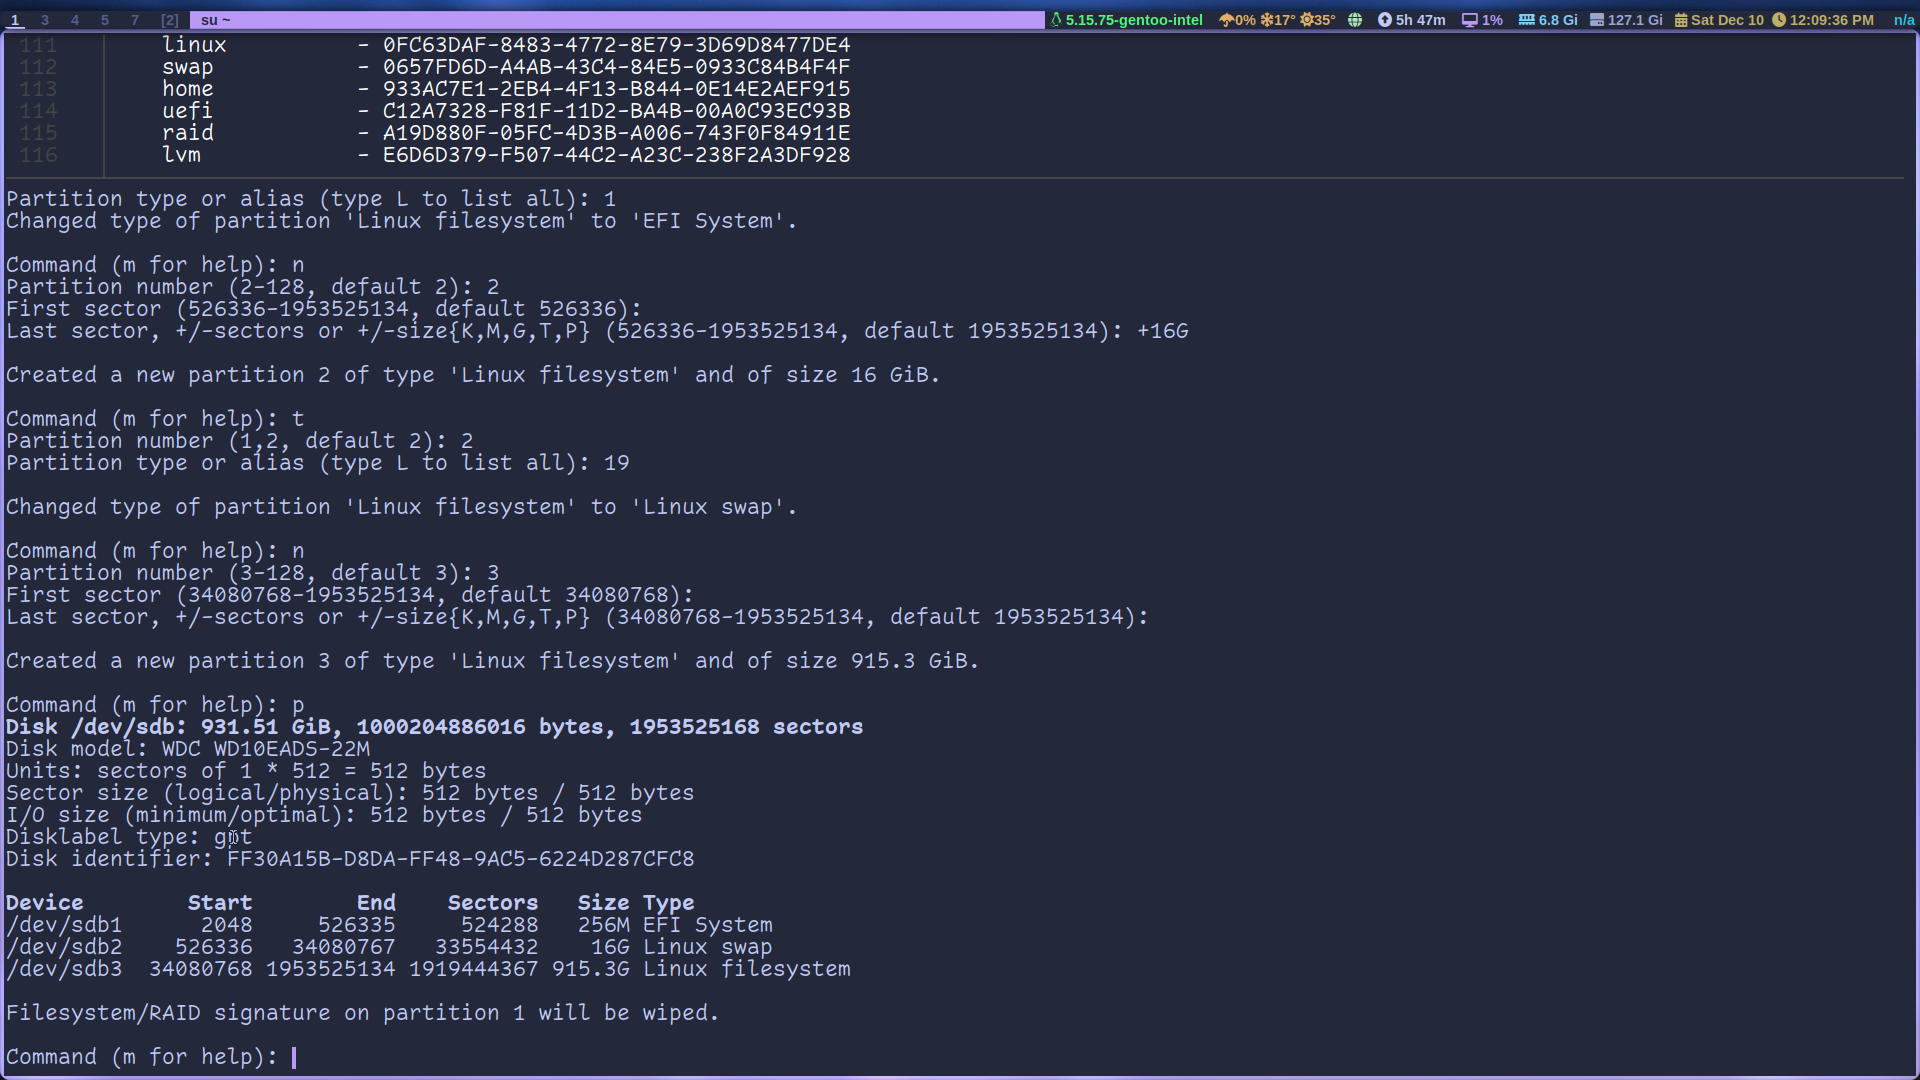
Press w to save the changes.
Adding filesystem
Now we need to create the files systems for the boot and root partitions.
Boot partition:
1mkfs.vfat -F 32 /dev/sdb1
This turns our EFI system partition into a FAT32 filesystem.
Root:
1mkfs.ext4 /dev/sdb3
With this we’re turning it into an ext4 filesystem and remember our root partition is the third partition.
And now to activate our swap partition. (FYI swap isn’t really necessary but it’s good to know to create and configure one.)
1mkswap /dev/sdb2
Activate it:
1swapon /dev/sda2
And that’s it. You learned how to use fdisk to partition and configure a hard drive.
Comments